
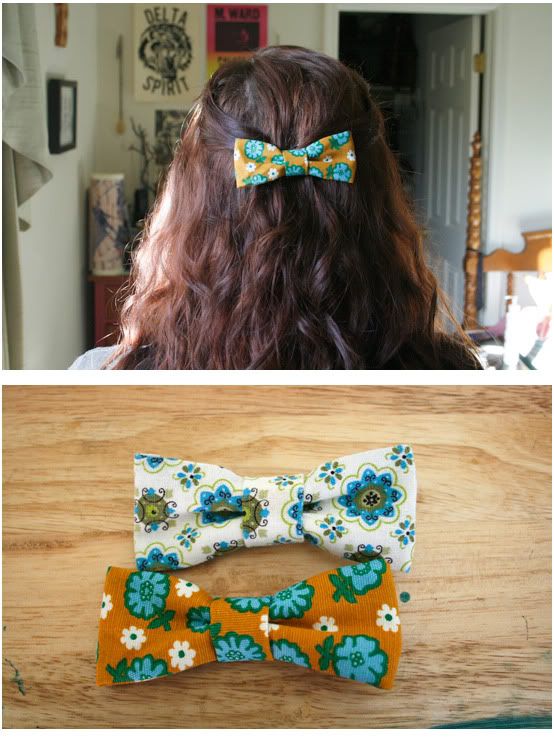
hi this is bethany from over at bunny picnic, when nicole asked for guest bloggers to fill in for her while she's being a busy bee, i jumped at the chance! i love her blog! with my guest post, i decided to show you lovely gals how to make your own hair bow! it's a really simple process, and it involves no sewing!
so let's get started!

what you'll need:
-fabric glue (i like aleene's tacky glue, but you could also use hot glue)
-pins (optional)
-scissors
-fabric of your choice (i chose a vintage floral print)
-what you want to attach your bow to (headband, bobby pin, alligator clip)
step 1: cut out a rectangular piece of fabric. it doesn't really matter the size. you can experiment with the size and make different sized bows. mine was about 6 inches by 12 inches.
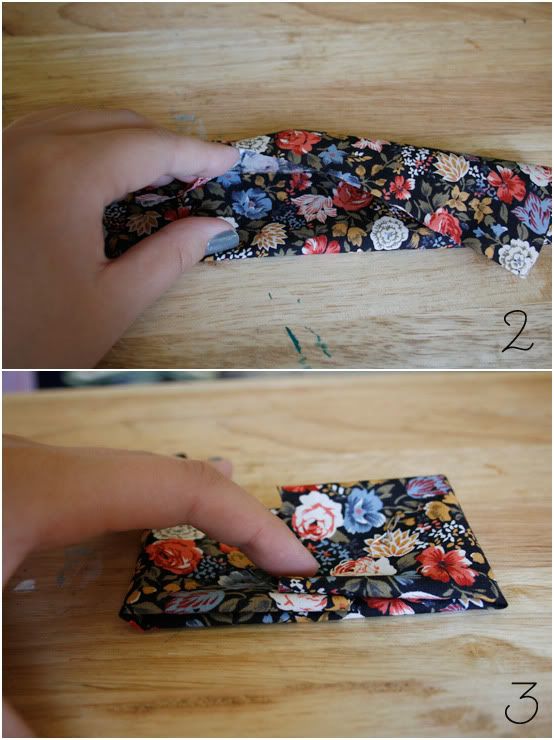
step 2: fold the piece of fabric kind of in thirds. what i mean by kind of is, don't have the edges touch. you can if you want, but i didn't. this determines the width of your bow.
step 3: fold the edges into each other. this determines the length of your bow
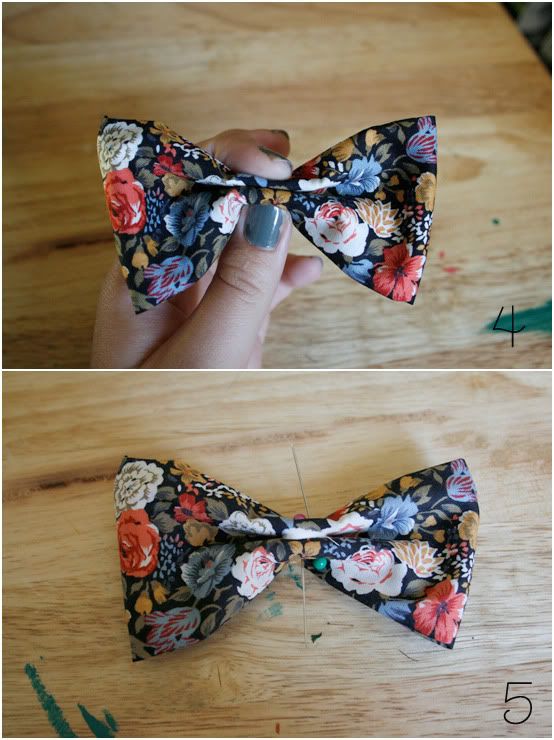
step 4: now pinch your fabric in the middle. it creates a bow shape!
step 5: this is where i use the pins. while holding the bow between my fingers, i shove the pins in next to each other from opposite sides to hold it together while i place a dot of glue in the middle of the fabric.
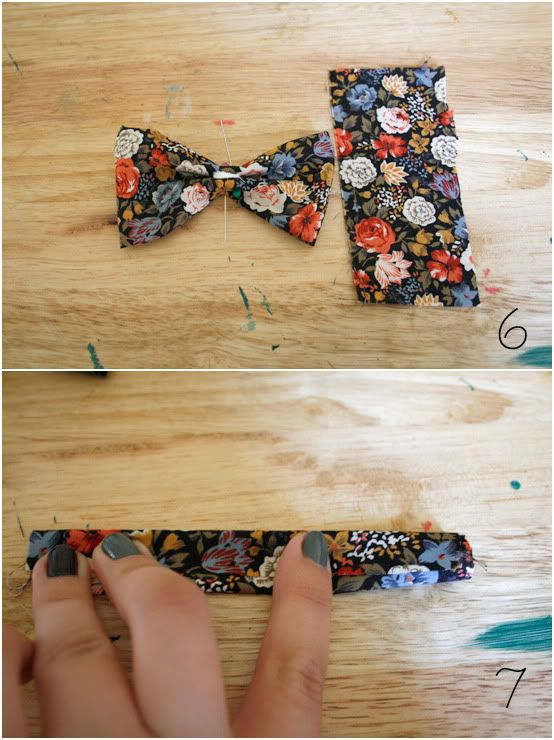
step 6: now you've got your bow glued in the center, and you need to cut out another little strip of fabric for the center. mine was about 2-3 inches by 4 inches. and i still cut off extra, so don't fret! this piece can be quite small
step 7: take the little strip of fabric and fold it in thirds. you may glue it down if you'd like. i didn't do it this time, but sometimes it helps to keep it together.
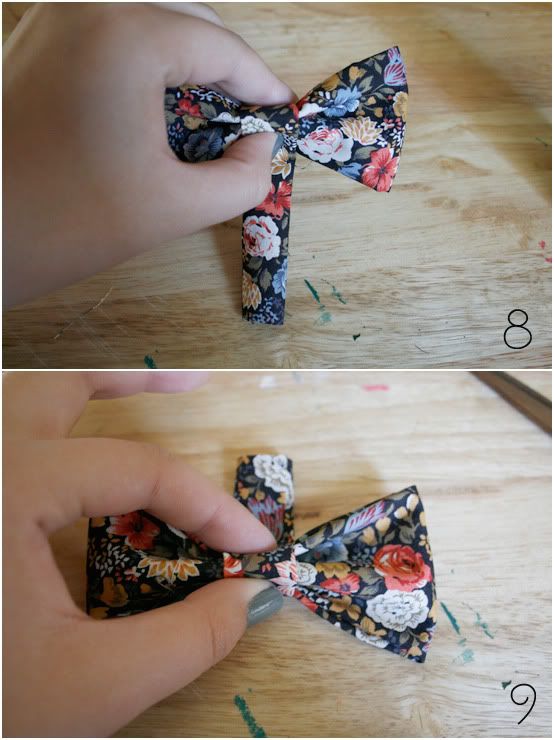
step 8: now, start with the edge of the small folded piece and place it where you glued the bow together. and wrap around.
step 9: this shows after you've gone all the way around the bow and you get confused and don't know what to do! do not fear! next step!
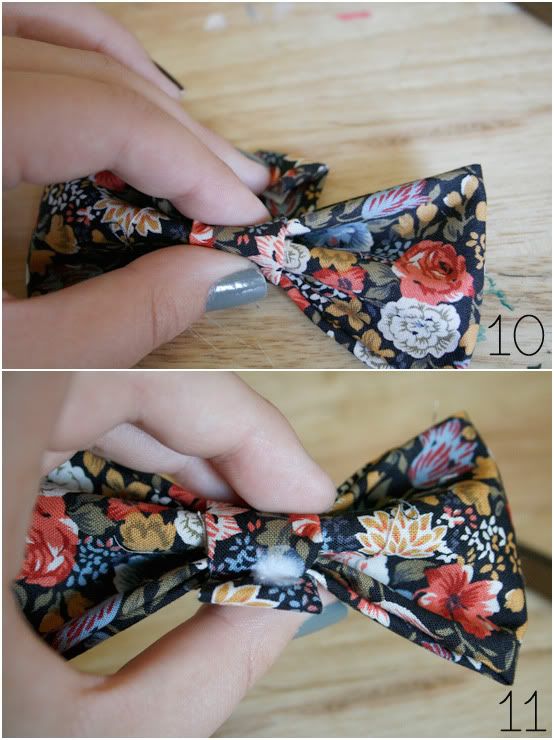
step 10: cut off excess fabric, and fold the remaining fabric into itself and place a dot of glue at the end.
step 11: here you can see where the fabric was folded and where the dot of glue was placed.
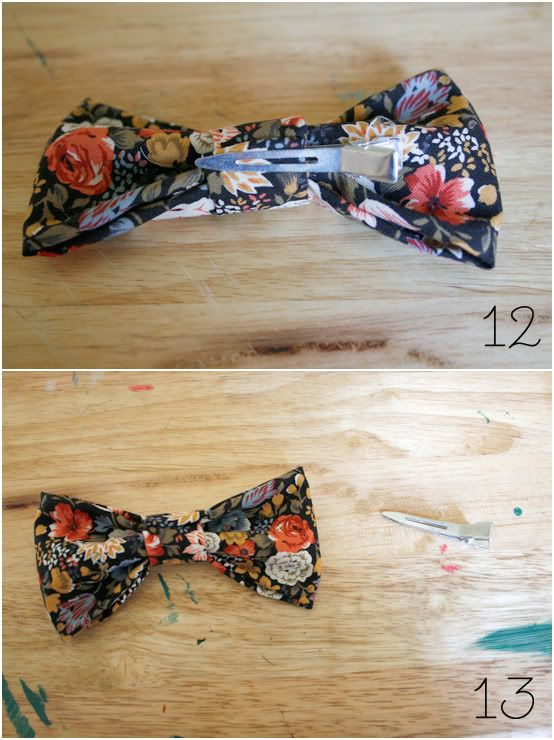
step 12: i used the alligator clip (optional) to hold the glued part for a minute so it can set. you don't have to let it dry completely, just long enough so it doesn't fall back apart.
step 13: now we're ready to attach the bow to whatever you picked out! i chose the alligator clip.
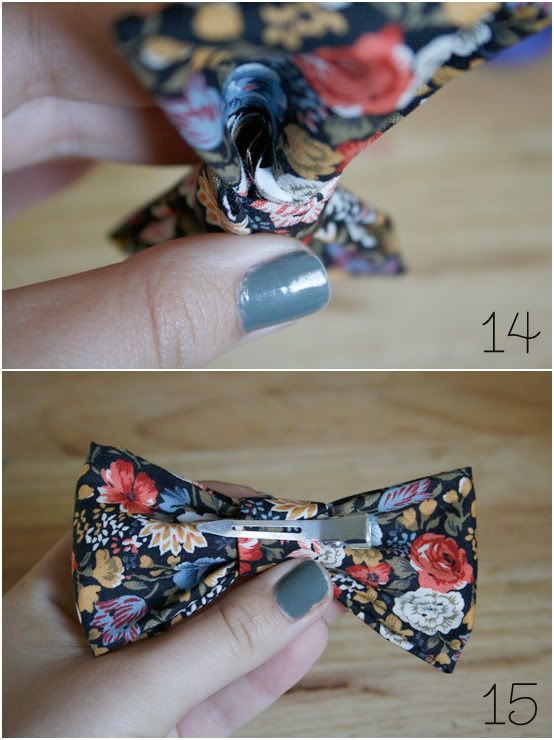
step 14: figure out where to place the clip/pin/headband and place some glue on the entrance 'hole'.
step 15: slide the clip/pin/headband in!
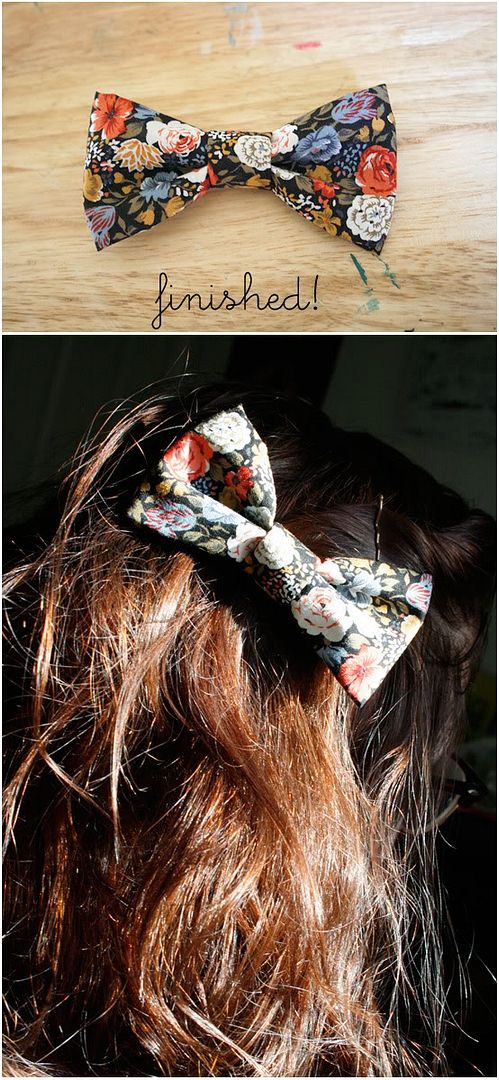
voila! you've made your very own bow!
have fun crafting!
much love from,
bethany
Such a great tutorial. I will definitely be trying this when i get home!
ReplyDeletePerfect. Thank you so much! Now I want to go to Michaels and buy some materials.
ReplyDeleteSuper cute DIY!
ReplyDeleteah these bows are so adorable!!!
ReplyDeleteSo cute, love this tutorial! :D
ReplyDeleteI'm totally going to do this.
ReplyDeleteThis is a great tutorial! I love your choice of fabrics. G'job!
ReplyDeleteMyriam from Myriad of Mischief
♥ ♥ ♥
Hi Bethany-- lovely to meet you~
ReplyDeleteI really love this tutorial! Have you ever tried it with lace before?
xo
Adorable! I was just working on some projects involving fabric so I will probably try this out real soon!
ReplyDeleteOooh! Adorable bows and now I have another project to add to the list of things I wanna do this summer! Thank you for sharing and for posting on the blog. (:
ReplyDeleteThis is SOOOO cute!!! This is one tutorial I seriously don't think I can ignore. I need to make my own bow now! Eeeek!
ReplyDelete